Saturday, February 22, 2014

Chicken Parmigiana


I've been making chicken parmigiana for years. Because I am Italian, it's one of those dishes you just have to know how to make. It's also my husband's favorite Italian dish, so I am happy to make it for him. The recipe below isn't exact, I never use measuring utensils to make this. So use this as a guide to make your own. Scale this recipe to your needs. Also, the pictures below the recipe display an insane number of chicken breasts; my goal was to have a few trays to freeze for a quick meal one night for dinner!


Ingredients

  • 4 skinless, boneless chicken breast halves
  • 2-3 eggs
  • ½ cup flour
  • 1½ cups dry Italian bread crumbs
  • ¼ cup vegetable oil
  • 16 oz. gravy (pasta sauce); may need more depending on preference
  • 2 cups shredded mozzarella cheese
  • 1/2 cup grated Parmigiano-Reggiano cheese

Directions

  1. Beat eggs in a wide, shallow dish.
  2. Put flour in a separate dish, and bread crumbs in yet another separate dish.
  3. Dredge each chicken breast in flour.
  4. Then dip each dredged chicken breast into the egg, then immediately dip into bread crumbs until completely coated.
  5. Heat vegetable oil on medium-high heat.
  6. Fry each chicken breast until golden-brown. This should take about 5-10 minutes, depending on how thick your breasts are and how hot the oil is.
  7. Rest the fried chicken on a paper towel lined dish. Put paper towels on each layer of chicken and keep resting the chicken until you are finished frying.
  8. Preheat oven to 350º.
  9. Coat 9x13 baking dish or pan with some pasta sauce.
  10. Place chicken over sauce, then cover the chicken with remaining sauce. Sprinkle Parmigiano-Reggiano cheese all over coated chicken, then sprinkle the mozzarella cheese. Coat well!
  11. Cook in 350º oven for at least 30 minutes, until cheese is bubbly and just about to turn golden.
  12. Enjoy with your favorite side of pasta and Italian bread.


Pictures


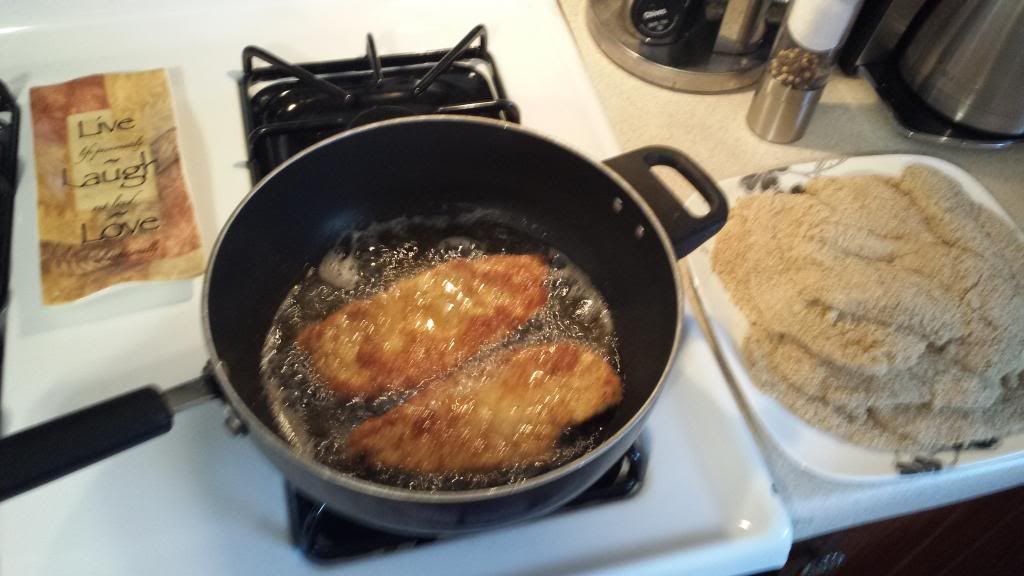
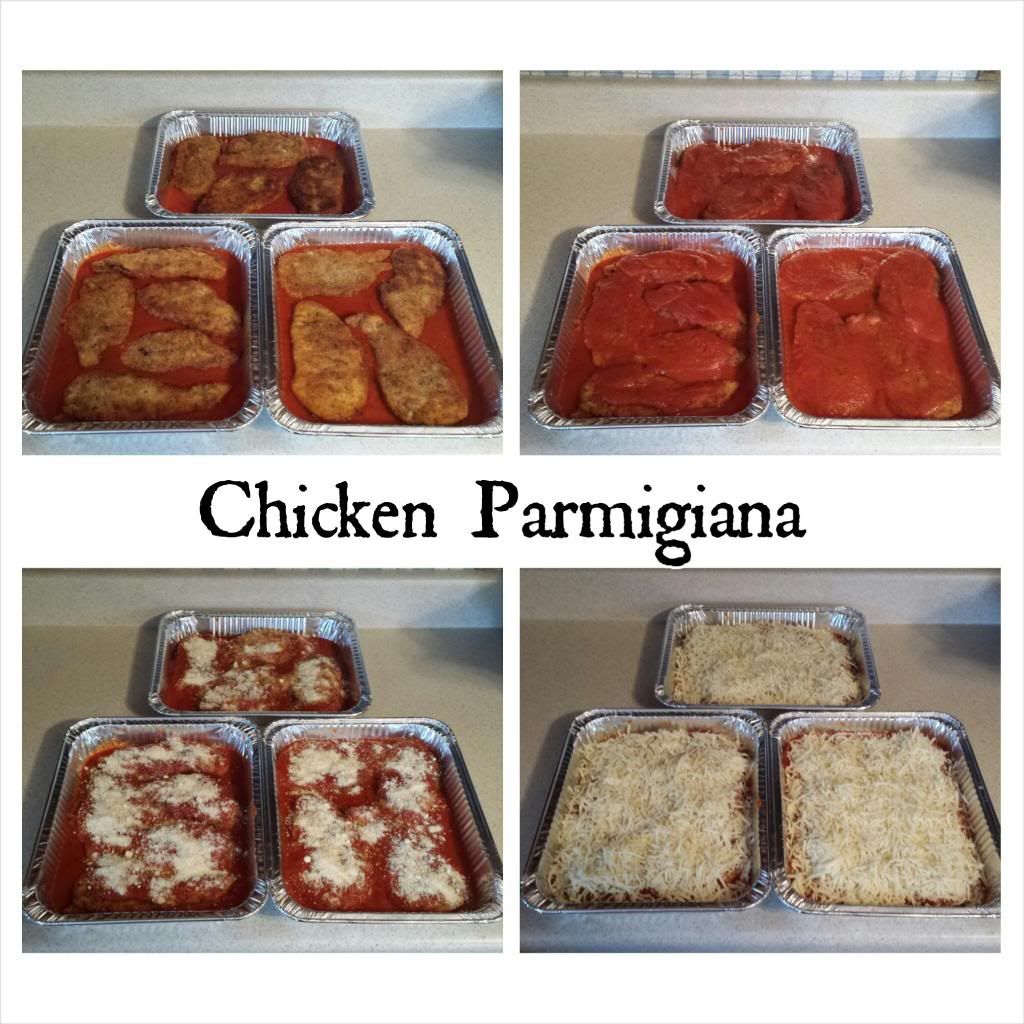
Frying the chicken! As you can see, I made a very large batch.


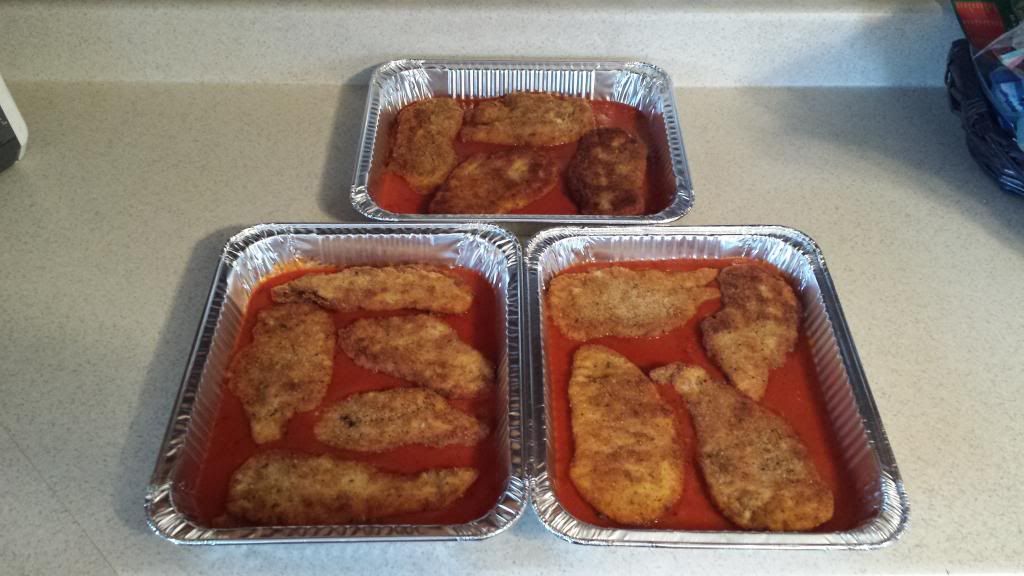
Pasta sauce lined pans with chicken.


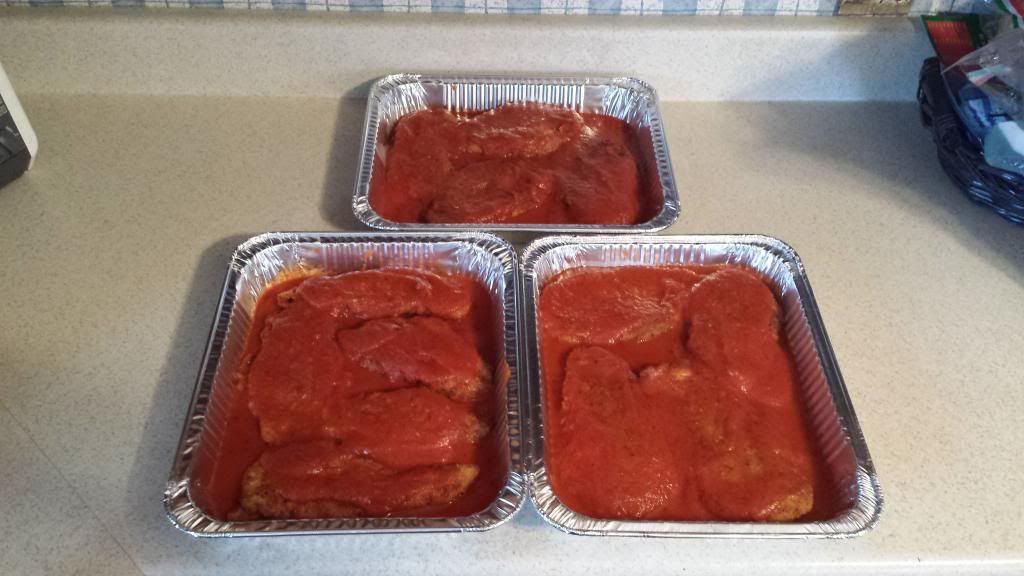
Chicken coated with pasta sauce.


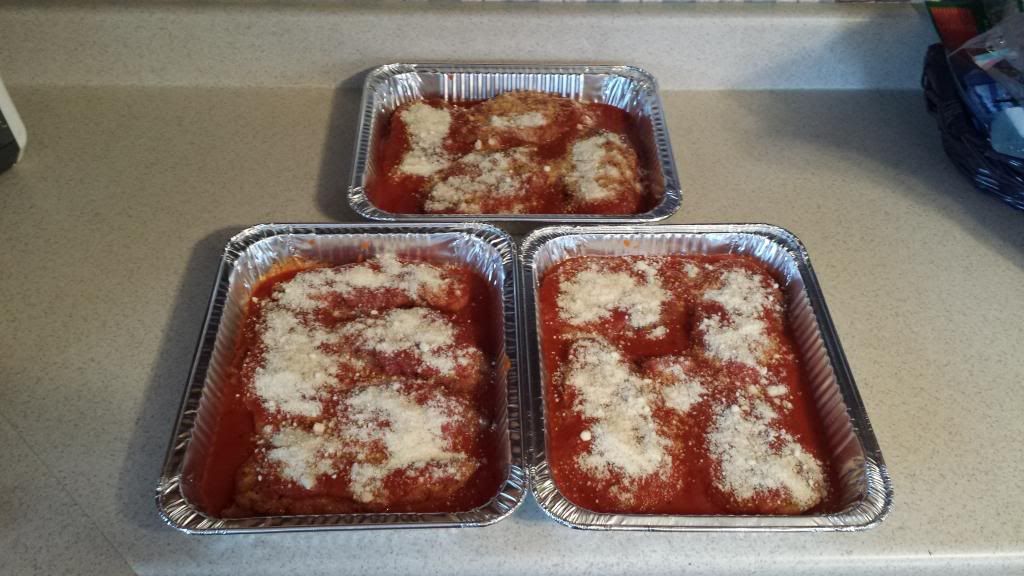
Parmigiano-Reggiano springkled liberally!


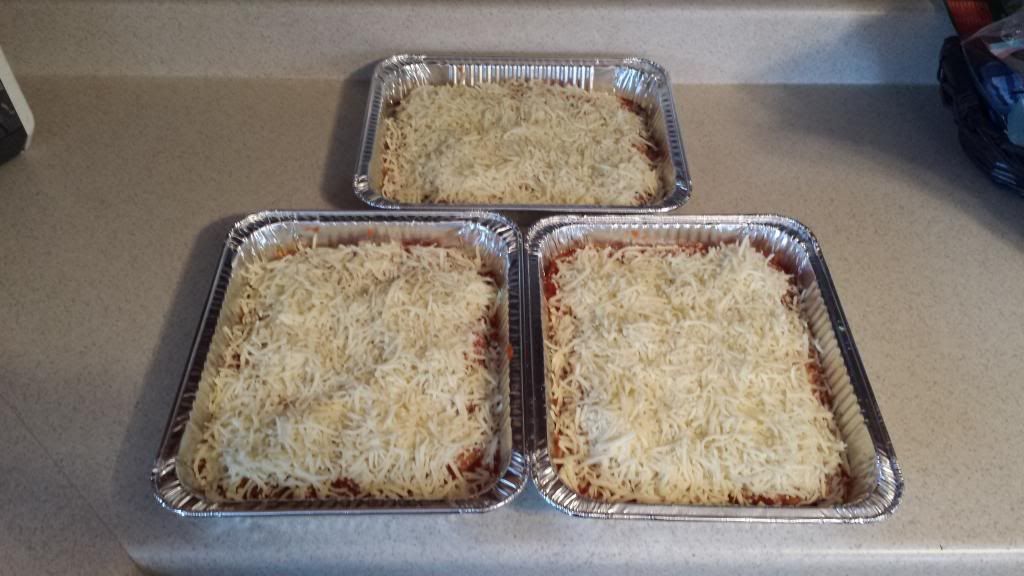
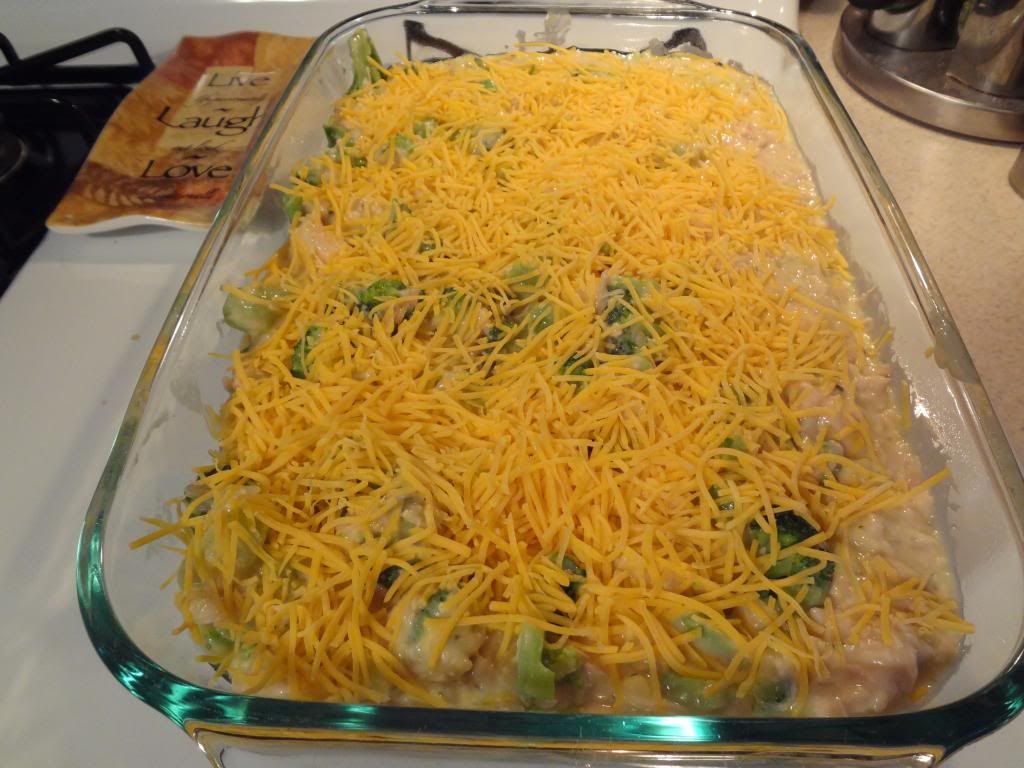
Lots of mozzarella cheese!


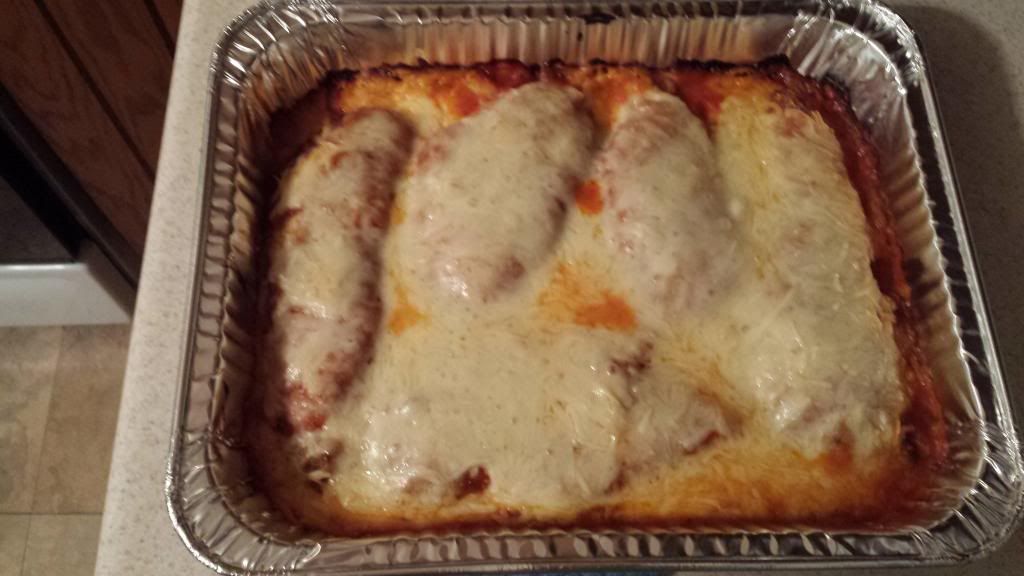
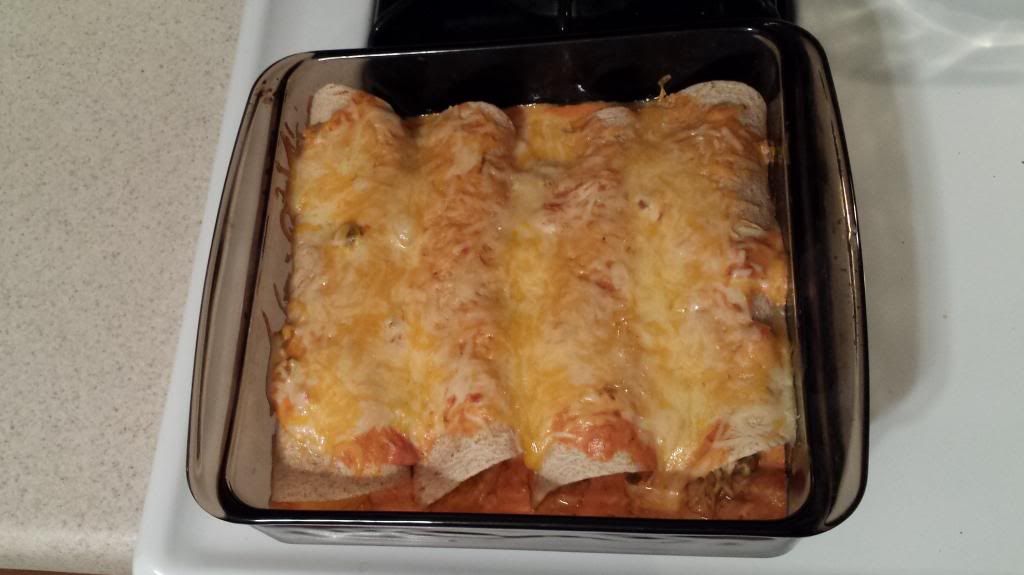
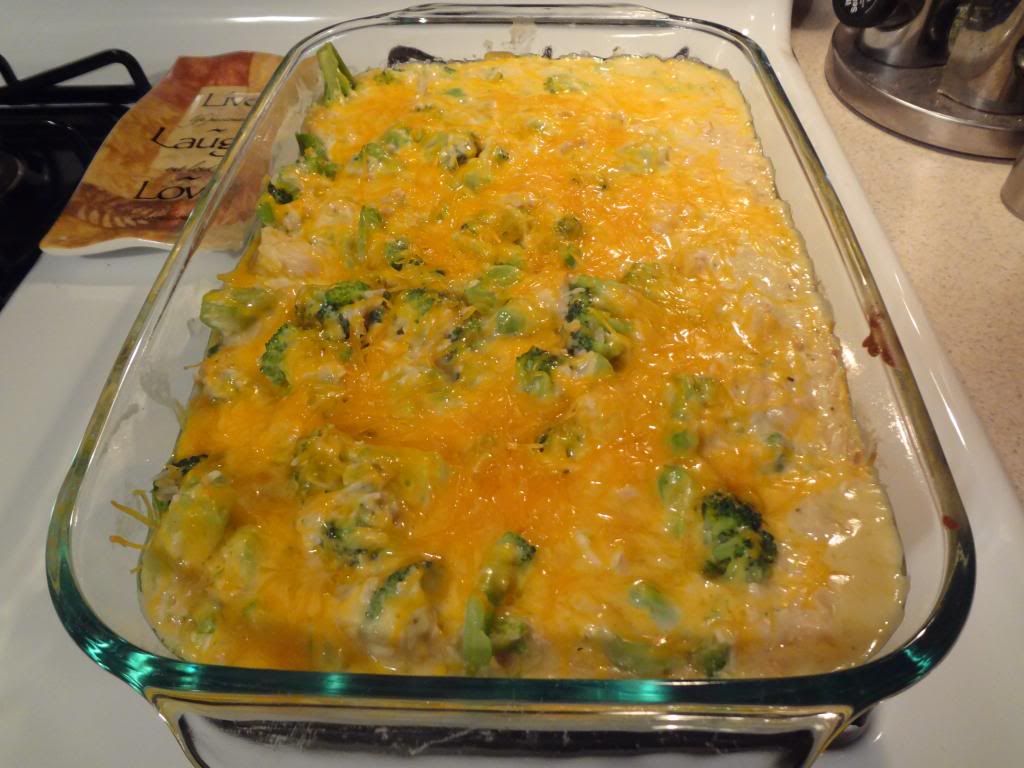
Cooked to perfection.


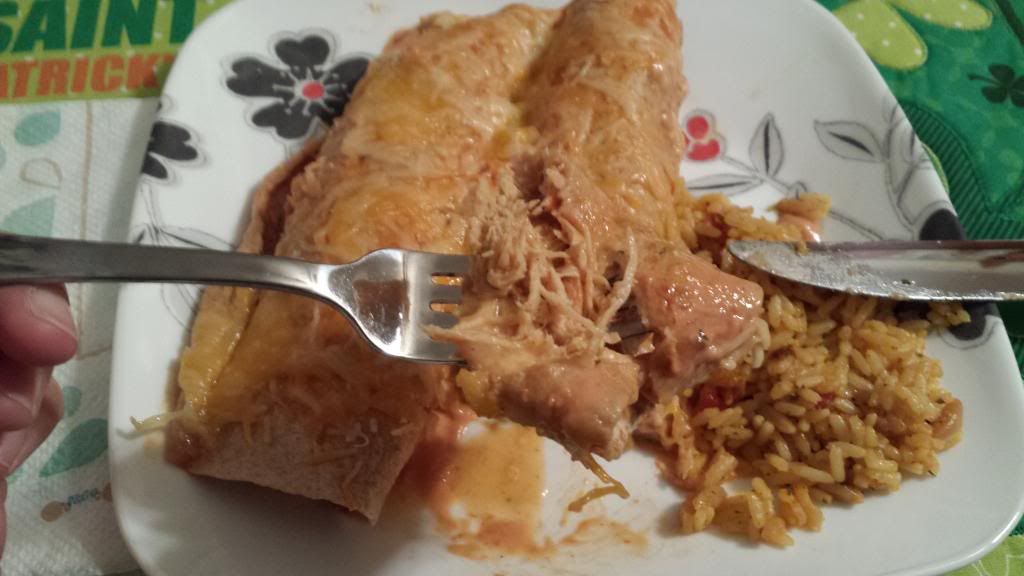
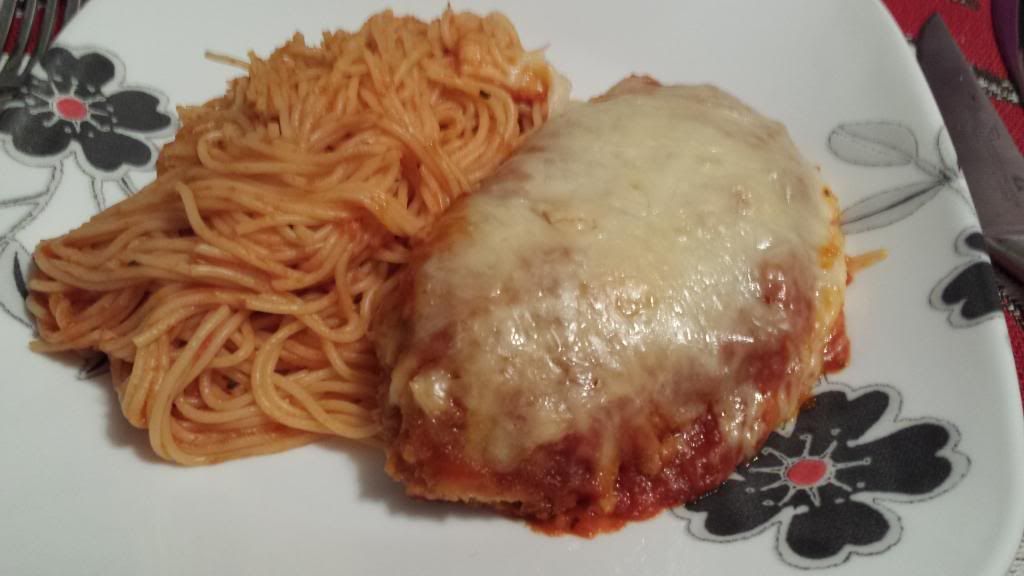
Served with spaghetti.


Close up.


Obligatory Instagram shot.


Tuesday, February 18, 2014

DIY Laundry Detergent - Update for 2014


So it's that time of year where we're running low on laundry detergent! Please see our blog post from March 23, 2013, DIY Laundry Detergent. Last year, we spent $29.55. I forgot to account for the Baking Soda because I had used a box that I had on hand. This year, I spent $38.81 and I was able to find Zote soap (mentioned in How Does She?'s blog), and we changed up the scent of the Purex Crystals Fabric Softener to "Fresh Spring Waters".


Ingredients

  • 1 (4 lb. 12 oz.) Box of Borax
  • 1 (3 lb. 7 oz.) Box of Arm & Hammer Super Washing Soda
  • 1 (4 lb.) Box of Arm & Hammer Baking Soda
  • 1 (3 lb.) Container of OxyClean
  • 2 (14.1 oz.) Bars of Pink Zote Soap
  • 4 (28 oz.) Bottles of Purex Crystals Fabric Softener

Cost Break Down

Total Cost of ingredients listed above: $38.81
Total ounces by weight = 383.2 oz.
2 Tablespoons = 1 oz. (for 1 load of laundry)

This means 383 loads of laundry at $0.10 per load.

Cost of living shows an increase of $0.02 per load of laundry expected for this year as opposed to last year. Still, that is LESS THAN $40 for laundry detergent. FOR AN ENTIRE YEAR.

As I said last year, "the math don't lie."


Picture Proof:


Directions

  1. Cut the Zote Soap into strips and then microwave.
  2. Use a Magic Bullet or food processor to puree the Zote Soap into a powder. If you don't want to use a processor, you can always use a cheese grater.
  3. Get a very large bucket and mix everything together. It is recommended that you layer the ingredients and mix thoroughly.
  4. You only need 2 tablespoons (even for the largest load of laundry)! The Purex Crystals lid is perfect for measuring.

Pictures (with comments)


The ingredients. List is above.


Zote soap.


Zote soap cut into strips. It felt like cutting through cheese.


What Zote soap looks like in the microwave.


Handy helper is amazed at what happens to Zote soap in the microwave.


Zote soap all pureed.


Handy helper mixing away!


Full bucket!


Empty containers then full containers.


Still have plenty in the bucket.


I put the rest in the old Tide box.


Time to do some Laundry!

Sunday, February 16, 2014

Grandma Mahon's Banana Bread


This is the recipe for my grandmother's banana bread. It's extremely easy to make. My Aunt Gail gave it to me over the phone many years ago. The directions were simple: Preheat oven to 350, mix all, bake in a loaf pan for 55-65 minutes." Obviously, my knowledge of baking requires me to break up that "mix all," so my directions are below, which result in a very yummy & moist banana bread. It is also a good idea to use a stand mixer. I have my mom's KitchenAid® Stand Mixer which has become a staple in my kitchen. Also to note, on this particular day, I doubled the recipe so I could make 2 loaves - I had a ton of ripe bananas. The recipe below is for 1 loaf.


Ingredients

  • 2½ cups flour
  • 1 cup sugar
  • 3½ tsp. baking powder
  • 1 tsp. salt
  • 3 Tbsp. vegetable oil
  • ¾ cup milk
  • 1 egg
  • 1 cup mashed banana

Directions

  1. Preheat oven to 350º.
  2. Spray a 9x5x3 loaf pan with non stick spray.
  3. In a separate mixing bowl, combine flour, baking powder & salt. Set aside.
  4. Mix wet ingredients in mixer on medium-high: egg, milk & vegetable oil.
  5. Add sugar. Mix well
  6. Gradually add flour mixture. Mix well, until smooth. This should take a few minutes.
  7. Peel babana(s) and mash in a separate bowl. Usually 2½ bananas should yield 1 cup mashed.
  8. Add bananas to bread mixture. Mix well.
  9. Pour mixture into loaf pan.
  10. Bake for 55-65 minutes. Toothpick should come out clean.
  11. Enjoy!


Pictures


Most of the ingredients. The eggs, milk & vegetable oil are already combined with the mixer.


All ingredients are mixed, except the bananas.


Dumped the bananas right in!


Mix! Mix! Mix!


Perfect!


2 loaf pans, ready to go in the oven.


Bake for about 65 minutes.


Half way done. About 26 minutes remaining.


Done! Sorry this one is blurry.


2 loaves baked to perfection.


Close-up of a loaf.


Obligatory Instagram shot.

Saturday, February 15, 2014

Ranch Chicken Enchiladas


This recipe originated from The Recipe Critic blog post, Ranch Chicken Enchiladas. One of my friends pinned this on Pinterest, and I saw it so I just had to make them.  We used her recipe to make the enchiladas but made a few changes to suit our needs. Cooking the chicken in a crock pot gets the chicken so tender and allows it to shred easily. These were fantastic, and went well with a side of rice pilaf. Note: I stuffed the enchiladas so much that I could only fit 6 in the 9x13 pan, so I had to put the remaining 4 in a 9x9 pan.


Ingredients

  • 3-4 Boneless Skinless Chicken Breasts
  • 1 package chicken taco seasoning
  • 1 package ranch dry salad dressing
  • 1 cup bottled ranch
  • 1 cup salsa
  • 2 cups shredded cheddar cheese
  • 1 (14.5 oz.) can chicken broth
  • 1 package white flour tortillas

Directions

  1. In slow cooker, cook chicken with broth, taco seasoning & ranch packets on low for 4-5 hours. Once the chicken is cooked, shred with 2 forks (it should just peel apart).
  2. Mix the 1 cup of ranch and 1 salsa in a bowl.
  3. Spray a 9×13 pan with cooking spray and spread a very thin layer of the mixture on the bottom.
  4. Start assembling the enchiladas by putting 2 Tbsp. of the ranch and salsa mixture on the bottom of tortilla. Then put the shredded chicken on top of that. Sprinkle with cheese and roll it up.
  5. Line up the enchiladas in the 9×13 pan and drizzle remaining ranch/salsa mixture over enchiladas, follwed by sprinkling heavily with the cheddar cheese. Bake at 350 degrees for 30 minutes or until the cheese is bubbling and enchiladas are heated through.
  6. Serve with rice pilaf, or any favorite side dish.


Pictures


Cooked enchiladas in the smaller dish.


Yummy bite!

Wednesday, January 22, 2014

Cheeseburger Soup


I had a craving for some Cheeseburger soup, so I went to All Recipes and found this recipe: http://allrecipes.com/recipe/cheeseburger-soup-i/?scale=8&ismetric=0. It's absolutely fantastic! It's hearty, creamy, and fills the belly on this cold winter night! The only 2 changes I made to it (besides doubling it) was add a can of Campbell's Cheddar Cheese soup, and cooked it all day in a crock pot. Total hit!


Ingredients (My version)

  • 1 pound ground beef
  • 1 chopped onion
  • 1 cup shredded carrots
  • 1 cup chopped celery
  • 3 teaspoons dried basil
  • 3 teaspoons dried parsley
  • 8 tablespoons butter
  • 3 (14.5 oz.) cans chicken broth
  • 6 potatoes, peeled & cubed
  • 1/4 cup all-purpose flour
  • 3 cups cubed Cheddar cheese
  • 3 cups 2% milk
  • 1 (10.75 oz.) can Campbell's cheddar cheese soup
  • 1/2 cup sour cream

Directions (My Version)

  1. In large skillet, cook & drain beef.
  2. Add 2 tablespoons butter, onion, carrots, celery & cook until onion is translucent (about 5 minutes).
  3. Prepare Crock Pot by adding 1 of the cans of chicken broth. Then add the cubed potatoes.
  4. Back to the skillet, stir in basil and parsley. Add 2 remaining cans of chicken broth. Bring to a boil, then reduce heat & simmer.
  5. In a medium saucepan, melt remainder of butter and stir in flour. Add the milk, stirring until smooth.
  6. Gradually add milk mixture to the soup, stirring constantly. Bring to a boil and reduce heat to simmer. Stir in cheese.
  7. When cheese is melted, add entire contents of skillet to crock pot (that already has the potatoes).
  8. Cook on low 6-8 hours.
  9. Add sour cream about 30 minutes before you want to serve.
  10. Enjoy!

Pictures


I didn't take my usual array of pictures while making this. Here are the resulting pictures once it was served and about to get in my belly.


Bowl.


Close-up.

Friday, January 3, 2014

Cheesy Chicken & Broccoli Casserole


This recipe is so easy to make and incredibly yummy! It's hearty and fills the belly, especially on this cold January day!


Ingredients

  • 3 (10 oz.) cans of cooked chicken, drained
  • 1 (12 oz.) package frozen broccoli florets
  • 1 1/2 cups uncooked white rice
  • 1 (10.75 oz.) can cream of chicken with herbs
  • 1 (10.75 oz.) can broccoli cheese soup
  • 1 (10.75 oz.) can of milk (use one of the soup cans)
  • 1 cup shredded cheddar cheese
  • 1 cup panko bread crumbs

Directions

  1. Preheat oven to 375* F.
  2. Drain chicken and put in a large mixing bowl.
  3. Rinse broccoli in collonder under warm water.
  4. In large medium bowl, mix together soups, milk & uncooked rice.
  5. Add soup & rice mixture to chicken in the large mixing bowl. Mix thoroughly (I used my hands).
  6. Add broccoli to mixture and mix thoroughly.
  7. Pour entire mixture into large casserole dish.
  8. Sprinkle shredded cheddar cheese evenly over top.
  9. Cover with aluminum foil and put into preheated oven for 60 minutes.
  10. After 60 minutes are up, remove foil from casserole dish. Sprinkle bread crumbs on top and put casserole dish back into oven on broil for a few minutes, or until everything is golden.
  11. Enjoy!

Pictures (with comments)


Ingredients.


Chicken, drained and in large mixing bowl.


Broccoli, rinsed in collonder.


Both soups mixed together with 1 can of milk.


Rice added to soup mixture and mixed well.


Soup mixture added to chicken; broccoli added after and everything mixed thoroughly.


Everything poured into a large casserole dish and shredded cheddar cheese sprinkled on top.


Panko bread crumbs (because I forgot to put them in the ingredient picture above).


Casserole cooked for 1 hour, covered with foil.


Panko sprinkled on top; put back into oven on broil for a few minutes until golden.


Nicely toasted!


Dinner is served!


Close-up. So yummy!